At some point in your parenting career, the act of changing a diaper will become second nature, burned into your muscle memory to the point where you could do it in your sleep. Which is handy, because at some point you probably will change a late-night diaper while not technically fully awake. But to start out, it can be a tricky proposition. So follow these simple steps and start wrapping up that Huggie like a pro.
Step one: Prepare your workstation.
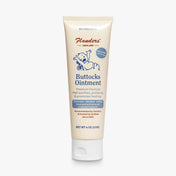
You’re going to want to do this quickly, since you’ll be holding an angry, highly soggy baby in one arm who has no problem screaming right into your ear. Lay down your changing pad (obviously, we recommend the Tactical Changing Mat) and get your supplies ready: diaper, wipes and butt cream. You’ll need them in that order, so prep accordingly.

Step two: Get the clothing out of the way.
You don’t need to be doing any more laundry than necessary, so this is pretty crucial. If your baby is in one of those onesies with the three buttons around the crotch, you’re on easy street. Pull the back up, folding the flap out, until the crease is somewhere below the shoulder blades. Is that excessive? Yes. But trust us. Poop can and will make it up that far. For the front flap, rather than fold it toward the outside you’ll want to fold it toward the inside. That way, the baby won’t grab the flap while you’re down there working and try to eat it.
Is your baby in one of those super-complicated outfits with flaps and zippers. Just lose the whole thing and join us in cursing people who design complicated baby clothing.

Step three: Get the new diaper in position.
This is a parenting technique you don’t learn until later on, but getting the fresh diaper ready to go underneath the dirty one lets your slide the little tyke from diaper to diaper without getting their butt on the changing pad. Lay it flat, then position the baby so the top of the chassis reaches their middle back. Obviously you don’t want to do this if the kid has soiled the diaper so bad it’s leaking all over the place. In that case, skip this step and just be glad the Tactical Changing Mat is so easy to clean.
Step four: Clean it up.
Open up the old diaper and sop up the mess with your wipes. If it’s a doozy of a twosie, just be careful not to let any leak out onto the fresh diaper. Lift the baby gently by the ankles so you can get up to the lower back, then hold him or her in position while you drop your wipes into the old diaper and roll it up. Slide it out and presto, the new diaper’s already in position thanks to your foresight in step two. Gently lower your baby into that pillowy soft as-yet-unpoopped-in diaper.

Step five: Soothe that diaper rash.
If there’s no sign of any diaper rash, you can skip this step. However, I always lather on that butt paste. Applying this rash-fighter in the new diaper lets the excess stay on the baby longer.
Step six: Mind the frills.
We can’t stress enough how important this part is. Along either side of the diaper’s core you’ll notice a line of frills. These are critical to containing your baby’s next mess, especially if they’ve started crawling. Make sure they are folded outward, so they’ll create a tight seal when you close the diapers up.
With the frills in place, just fold it up, secure the closures and pat yourself on the back for another successful diaper change. Or just go back to bed, depending.
That’s it for Intro to Changing a Diaper. Keep an eye on our blog for a future installment where you walk you though a situation every dad has faced when confronted with a changing station-free men’s room: changing a diaper one-handed.

